


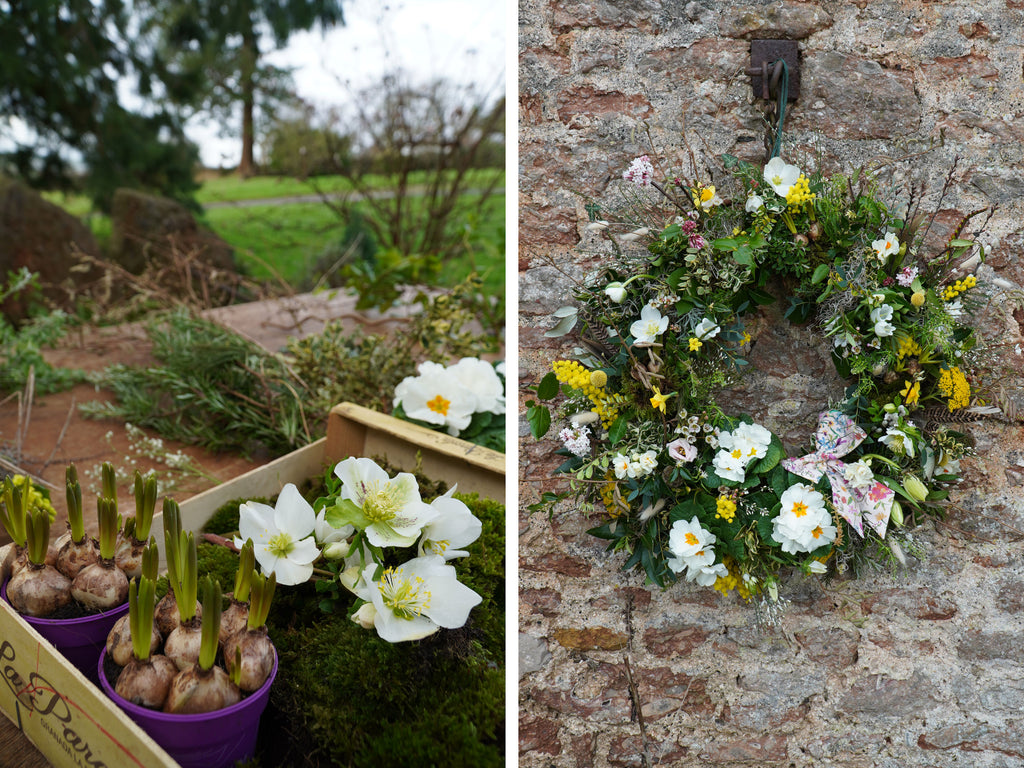
We are delighted that the tradition of wreaths has evolved beyond just Christmas, with seasonal wreaths now adorning doors throughout the year. By the time spring is on the horizon, we’re often desperate to see some form of natural life, celebrating when snowdrops pop up beneath trees and blossom buds appear on trees, which is why spring wreaths have to be our absolute favourite. They mark a joyful end to winter and an opportunity to embrace the beauty and vibrancy of the season.
A living wreath is a creative and sustainable alternative to traditional wreaths, crafted using living plants rather than cut flowers. Incorporating spring bulbs like Hellebores and Primula plants into a living wreath adds a unique charm and seasonal flair and the finished wreath adds a welcoming touch to our homes, inviting us to embrace the rhythms of the year, appreciate each season's unique qualities and find joy in the ever-changing landscape around us.
Earlier this month Coco & Wolf joined forces with Bouquet Florist in Cheddar to bring you a step-by-step guide for creating a living wreath this spring. The process of gathering foliage, spring plants and decorative elements evokes a sense of connection with nature while fostering mindfulness and relaxation - it’s the perfect creative endeavour for a few hours at the weekend which will hopefully be both simple and enjoyable when following this how-to guide. By looking after your wreath once it’s hung up in pride of place, this living wreath will see you well into spring!
What you will need for your Living Wreath
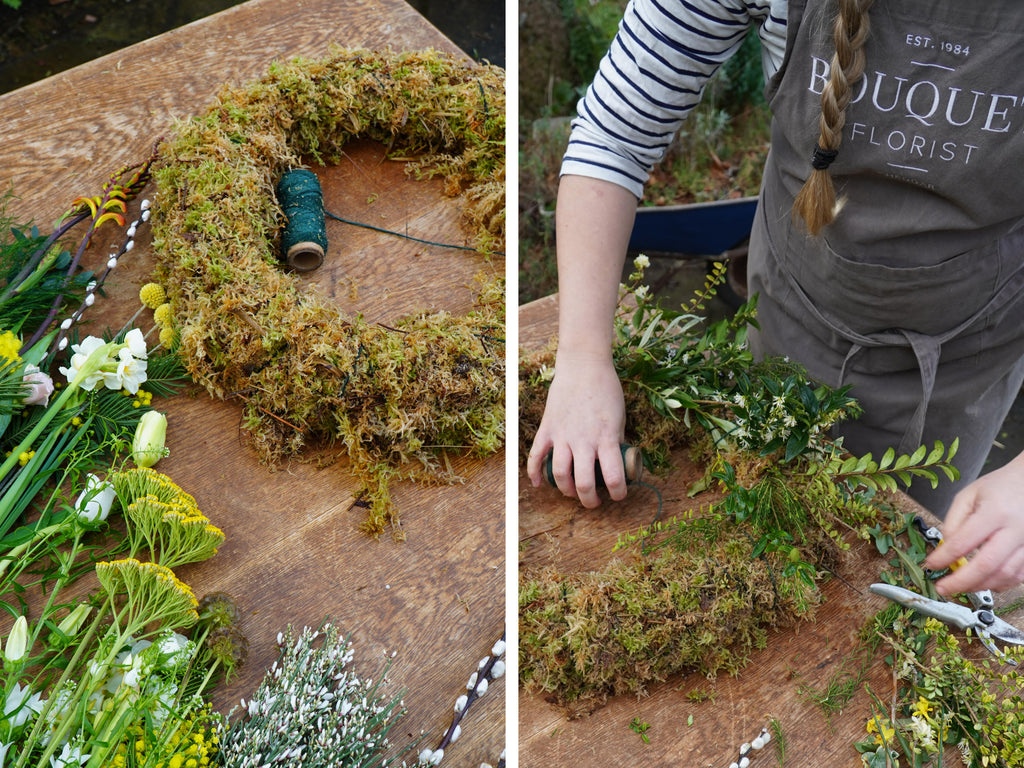
- Wire wreath frame - 30cm size works well and can be easily sourced from floristry suppliers
- Sustainably sourced moss for your base
- Twine
- Your chosen garden foliage, flowers, seasonal bulbs and plants - you can find our planting list below
- Decorative features such as bunny tails, feathers and twigs
- Secateurs or sharp scissors
Your chosen foliage really can be anything and everything! Start in your garden - look for evergreens and a variety of different leaves, textures and tones. Pop all of your foliage stems in water for about 24 hours before making your wreath. This makes sure there’s lots of water in the stems to keep your living wreath fresh.
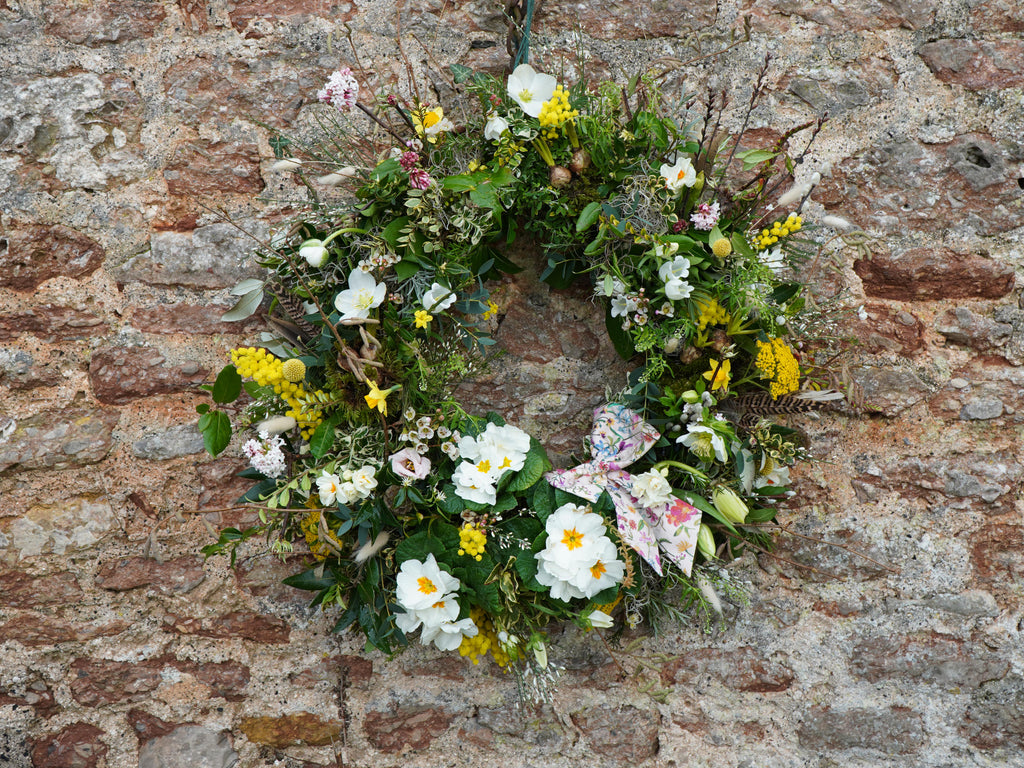
As well as garden foliage, in the Coco & Wolf Living Wreath we included; primula plants, muscari bulbs, narcissus, hellebores, wax flower, mimosa, viburnum, campanula, broom plant, craspedia, and scabiosa.
How To Make a Living Wreath
Make your moss wreath base
Tie one end of your twine onto the wire frame - you will be using the twine to secure the moss. Create tight bunches of moss before pushing it into the wire frame. Secure this with twin before adding more. Keep working around the circular frame packing the moss in tightly and be generous - you need enough moss that you can’t feel the frame once it is filled. Finally, create a long loop of twine at the top of your wreath which you will use to hang it up once finished.

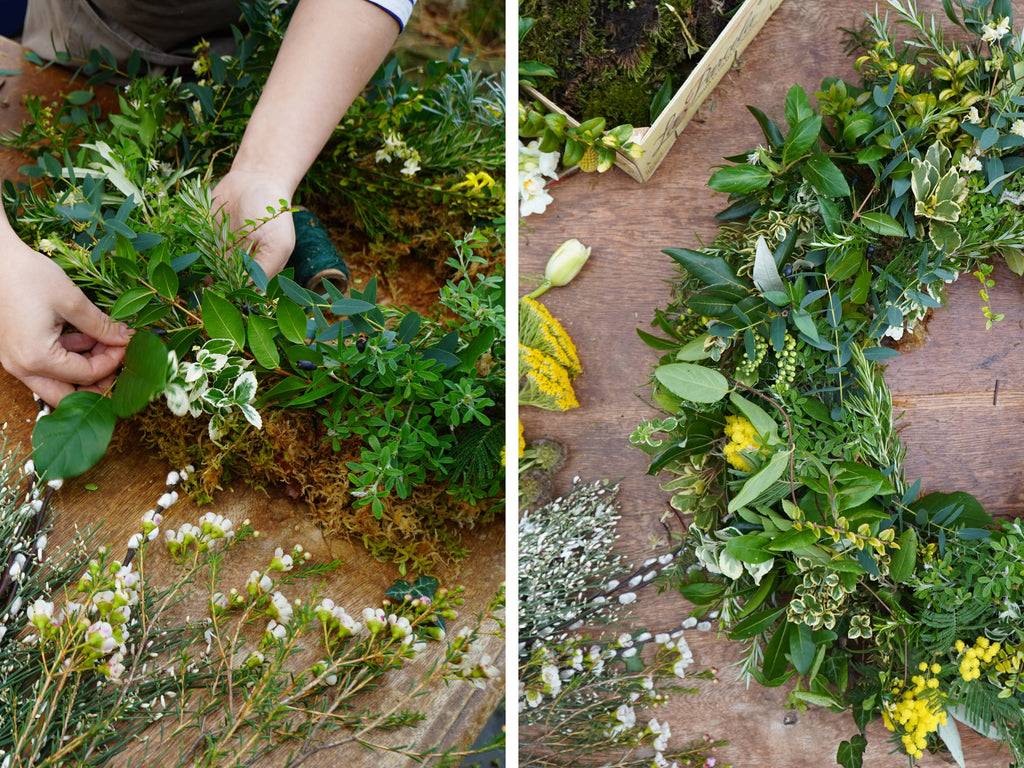
Add foliage, plants and bulbs
You want to work with a variety of textures and shades of foliage. The length of the foliage will determine the overall size of your wreath - the longer the foliage, the bigger the wreath.
Strip the bottom of each stem so it will push easily into the moss wreath. Angle the stems and push them into the moss as securely as you can, being careful not to push them out the other side of your moss base.
Bind the foliage to your moss base with more twine to make it secure. Keep working in the same direction making sure your foliage overlaps each other to add depth to your wreath. In positions of your choosing, you can now add bulbs and plants - bulbs can be pushed in the moss, and larger plants can have their roots covered in moss, before securing onto the base with twine.
Work around the base, covering the entirety with foliage, plants and bulbs, and once complete check for any gaps, especially in the inside and outside of the base. If you find any gaps, fill them with more foliage.
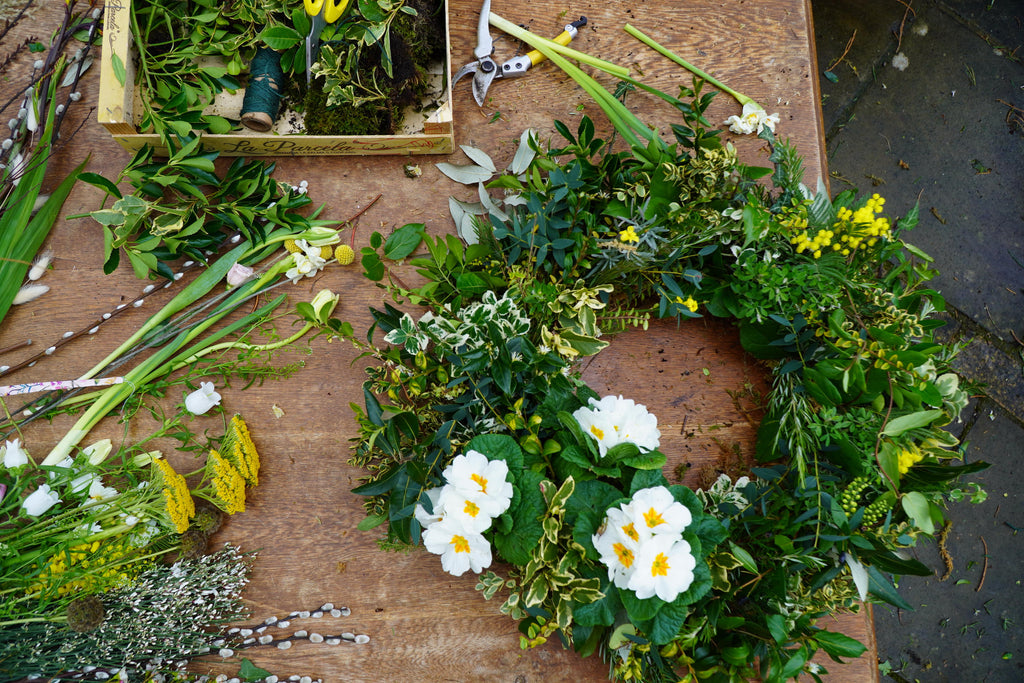
Introduce flowers and decorative elements.
Once your base is full of evergreen foliage and beautiful seasonal bulbs, you can begin adding more interest and colour. This is your opportunity to get creative. We used flowers including mimosa, waxflower, viburnum and craspedia and twigs, pheasant feathers and pussy willow for texture, while dried bunny tails added a seasonal twist ahead of easter.
Just as you worked in the same direction adding your evergreen, you’re going to work in one direction when adding your interest, adding larger pieces first, then layering up fluffier and lighter textures. Push flower stems firmly into your moss as much as possible to ensure they can reach moisture. If you’re working with dried flowers the stems can be brittle so tuck these under twine instead.
Keep standing back and looking at the balance of your details. Less is more and this is a good time to titivate and get the details balanced and just how you like them. Give your living wreath a really good spray of water to ensure it is hydrated, before adding your ribbon or bow. We’ve used one of our beautiful Liberty fabric bows in Linen Garden.

Living Wreath Aftercare
Keep your wreath well hydrated by spritzing it with water regularly. Once a week, pour water over the back of the wreath to keep the moss moist. Doing this will ensure your wreath sees you through spring.
The beauty of a living wreath is its ever-changing appearance. The bulbs and plants will continue growing and evolving but some of your flower stems may die - replace these to make your wreath last longer.
Once your spring wreath has finished, remove all the details and foliage so you’re left with a moss ring. By then you may be ready to make another wreath, so just submerge the moss ring in a couple of inches of water (it acts just like a sponge), before squeezing out the excess water. This will provide you with a perfectly rehydrated base for your next wreath! If you want to, you can also store the moss base by hanging it in a shed or garage to dry out.
After exploring the how-to guide, are you feeling inspired to try your hand at making your own living wreath this spring? It's a wonderful way to celebrate the season and we can't wait to see your creations! Please do share them with us!
Leave a comment